Everything here is WIP. Things can and WILL CHANGE.
IcmtCeiver
IcmtCeiver is a Superheterodyne based Transceiver, featuring 6 bands: 3.5MHz, 7MHz, 10MHz, 14MHz, 21MHz and 29MHz, Peaking output being 69W.
Basics
The Digital part is controlled with a ESP32-S3 and a AD9850, with 1 IO expander for the buttons, and a custom smooth knob with a bearing. The design is as compact as possible, squishing as much as physically possible inside. The aprox. weight on completion is 750g and takes 13.8V via a XT60 connector.
The display is a E-Ink / E-Paper display like in E-Books like the Kinde, just a diff size. it is 2.13 Inches diaganal.
The 3 knobs are for Speaker loudness, RF-Gain And Bandwith
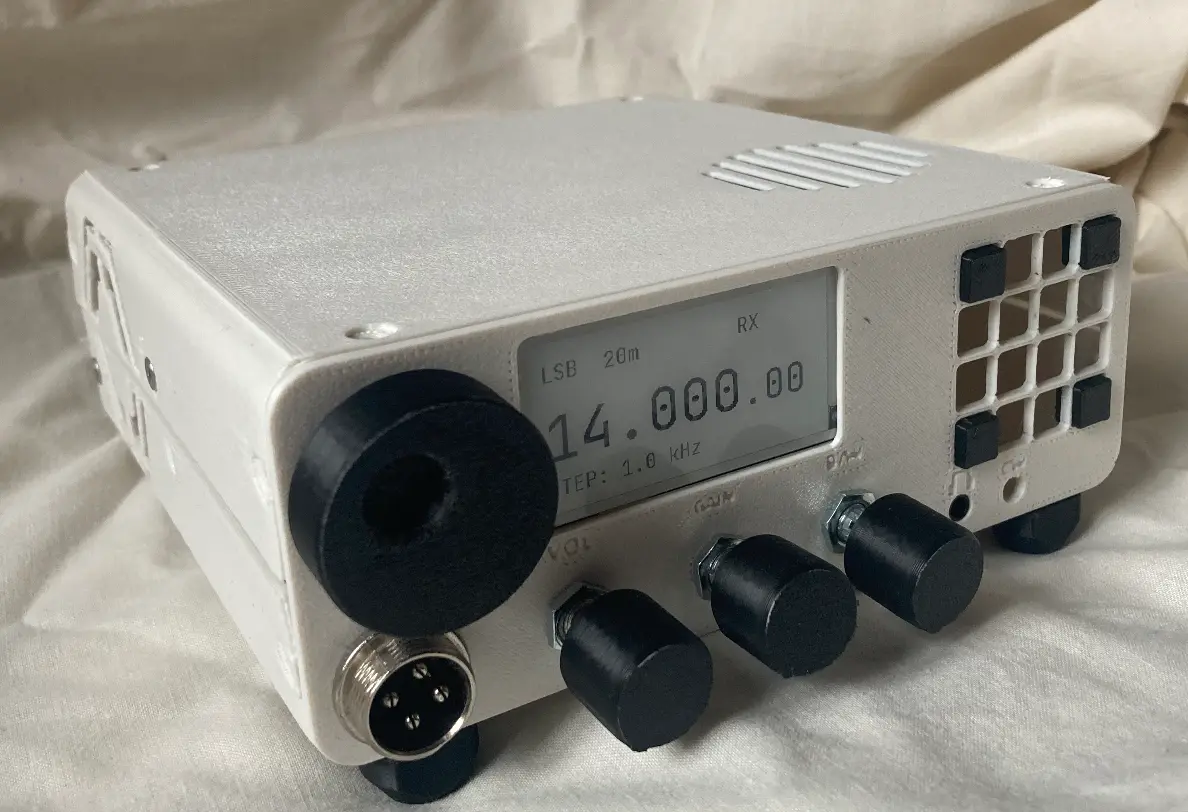
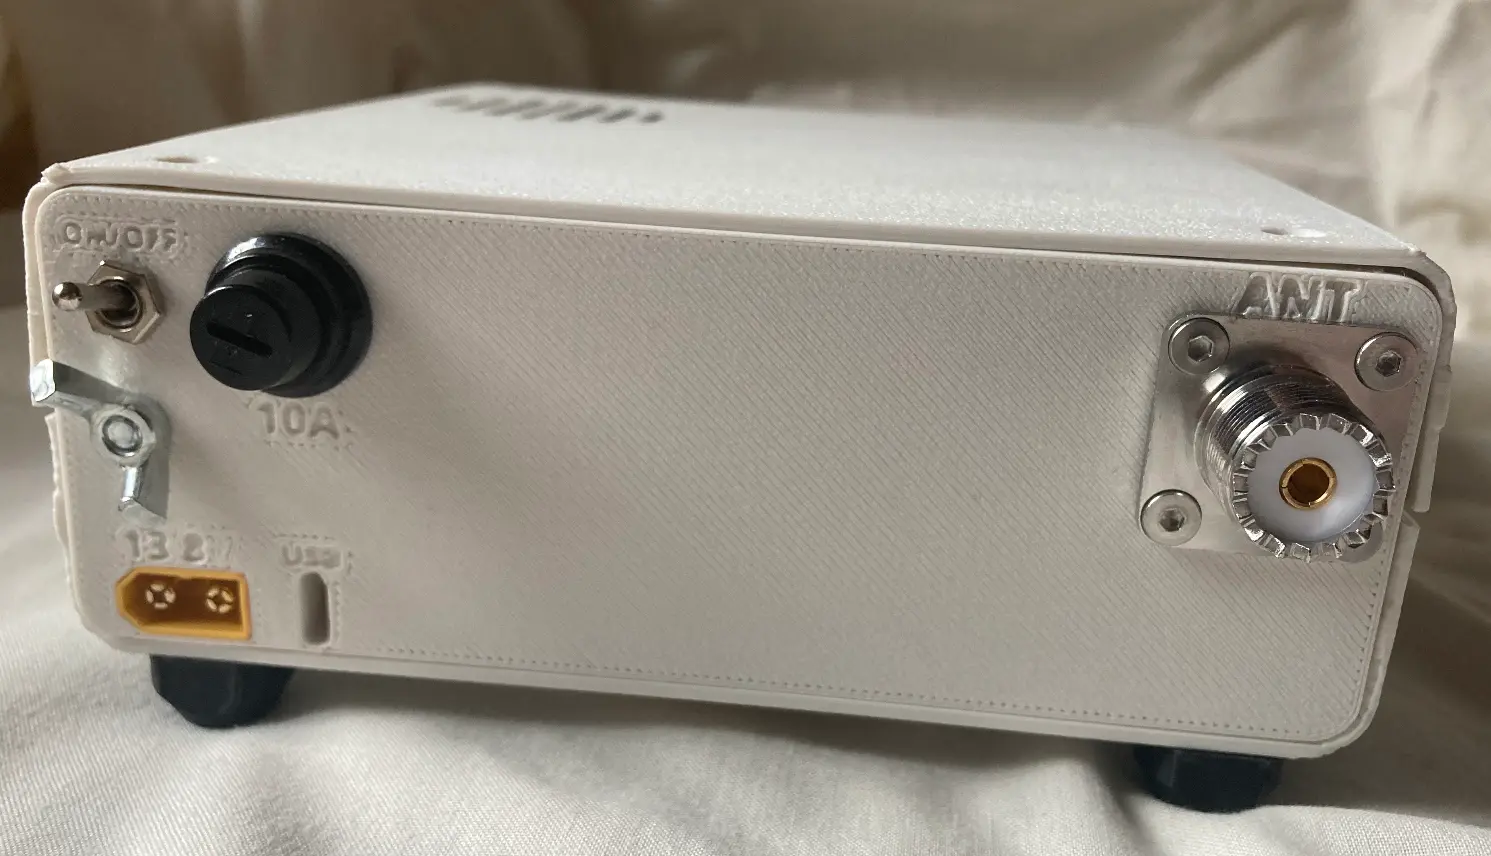
From the front there are 2 ports, Headphone out, and CW Key supporting single or dual paddles, with options to change handling in settings. From the back you have a 10A fuse port, main power switch, grounding lug, power in, and USB-C which controls CAT and a built in sound card for full control with software, and ofc firmware updating.
Required Components
-
3D printer is a good to have,
-
SSB6.1 Kit: AliExpress Link ²
-
PCF8574 GPIO Expander: AliExpress Link
-
Toroid (anti interferance): AliExpress Link
-
SO239: AliExpress Link
-
AD9850: AliExpress Link
-
ESP32-S3 type: N16R8: AliExpress Link
-
WeAct type: 2.13-Black-White: AliExpress Link
-
WH148 type: 5k: AliExpress Link
-
JST connectors type: XH 2.54mm: AliExpress Link
-
Buzzer type: Passive: AliExpress Link
-
Membrane Switch type: 4x4: AliExpress Link
-
EC11 Encoder: AliExpress Link (Goin to change to something else)
-
Tinfoil
-
Wires
-
Optionally custom pcb
Note: Some links are referrals.

If your not totally sure how to wire it, comment on yt and I’ll draw a schematic (eventually ill have everything, but not got time.)
Build.
Firstly, The Schematic, there are 3 in total, but only 1 is of interest mainly:

The schem above is for the Digital part at the top, But i will also provide the MainTRX scem “SSB6.1” and TinyPA70 (Note they are not mine):
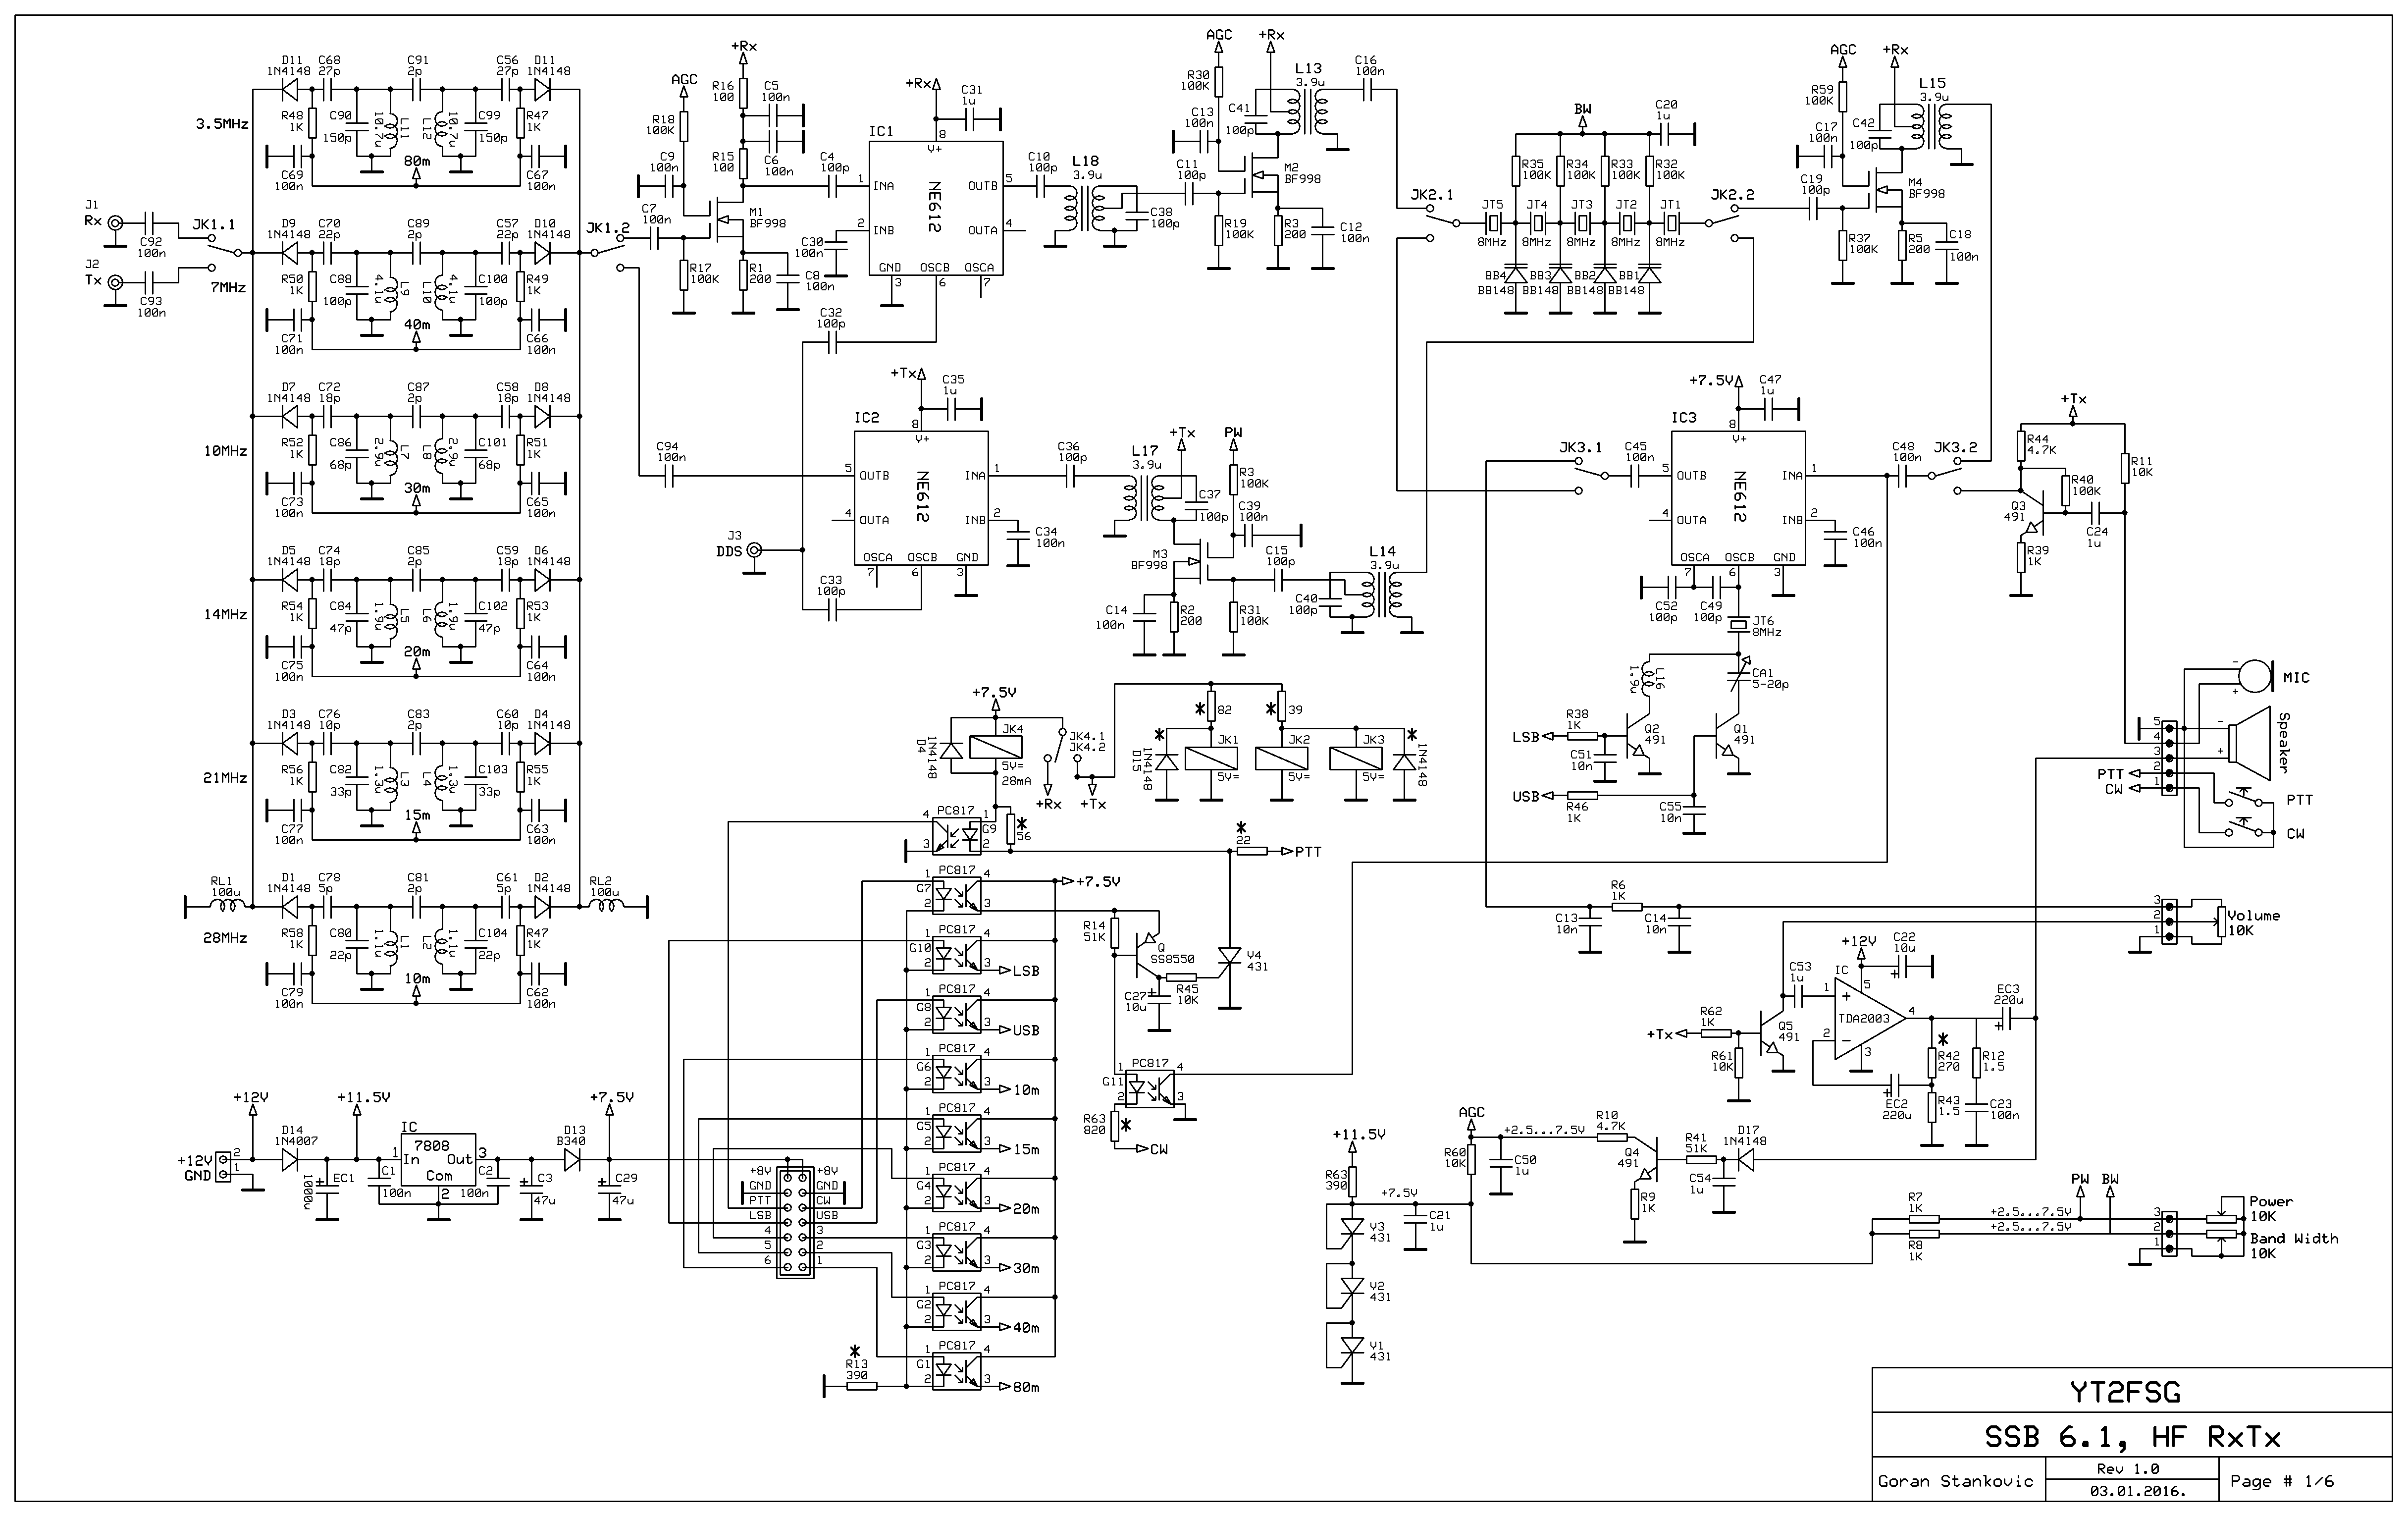
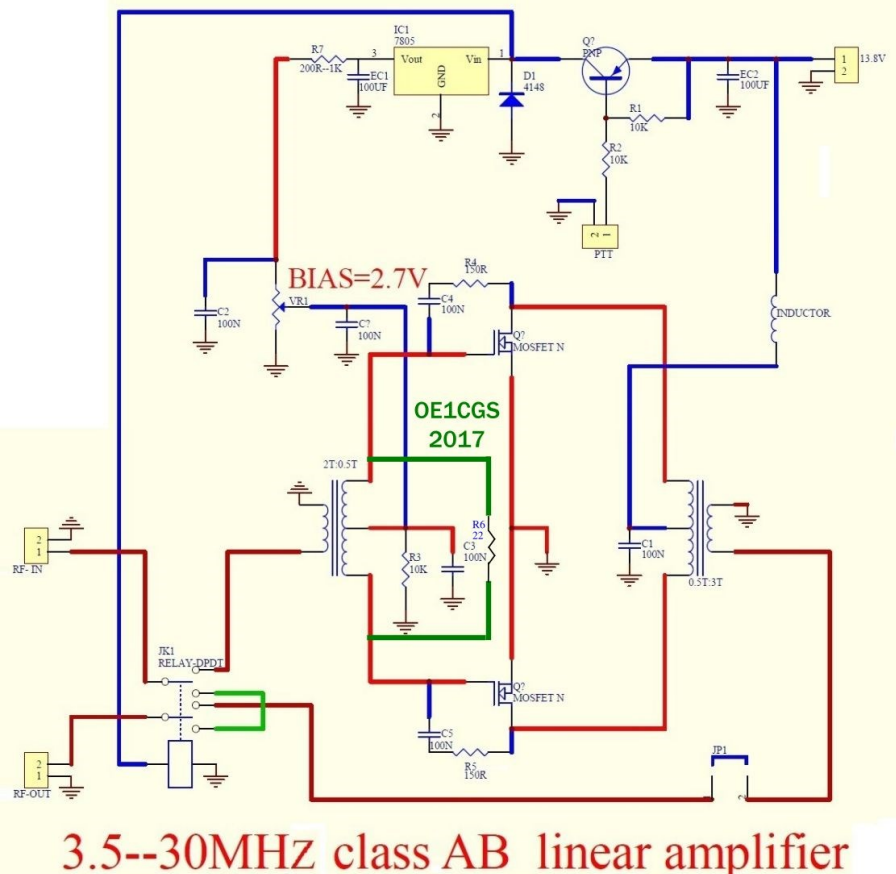
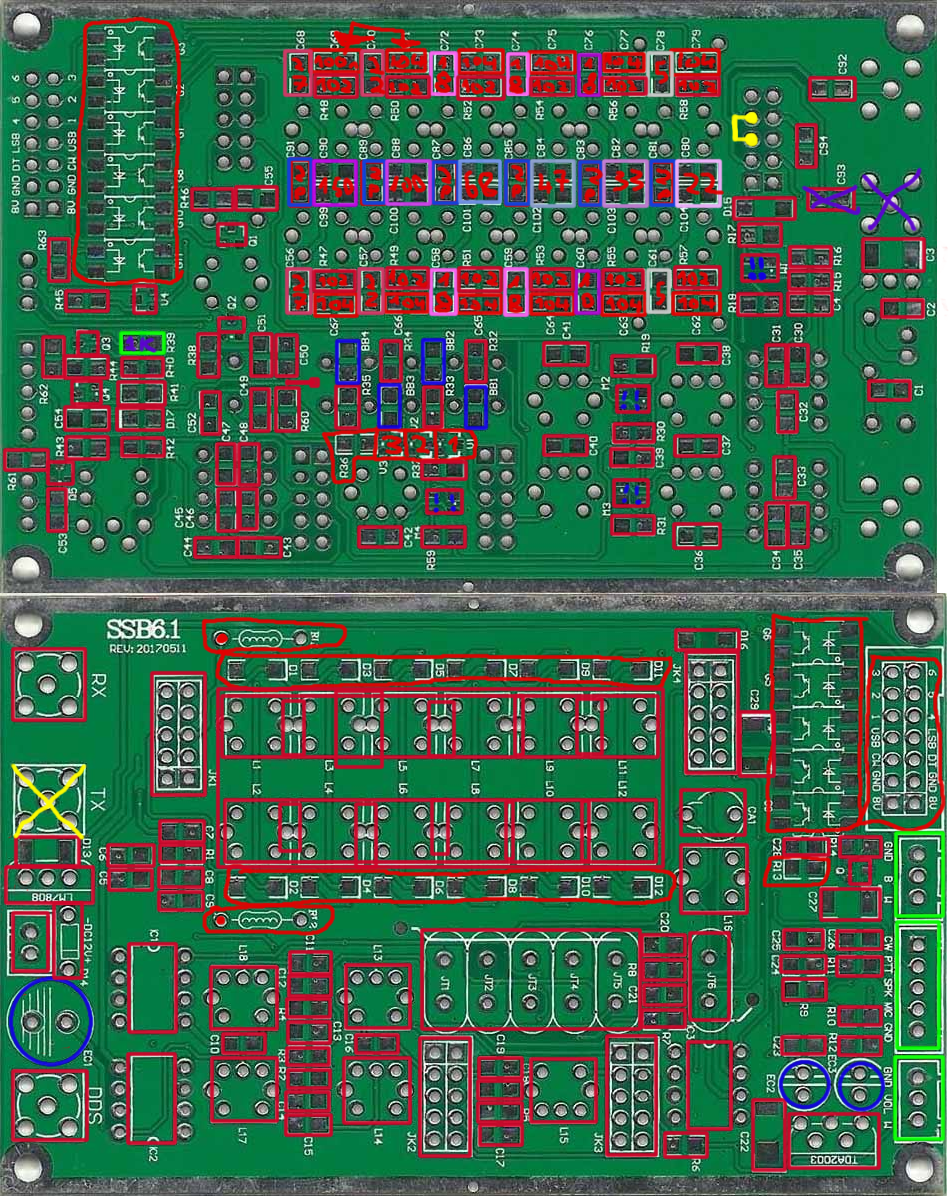
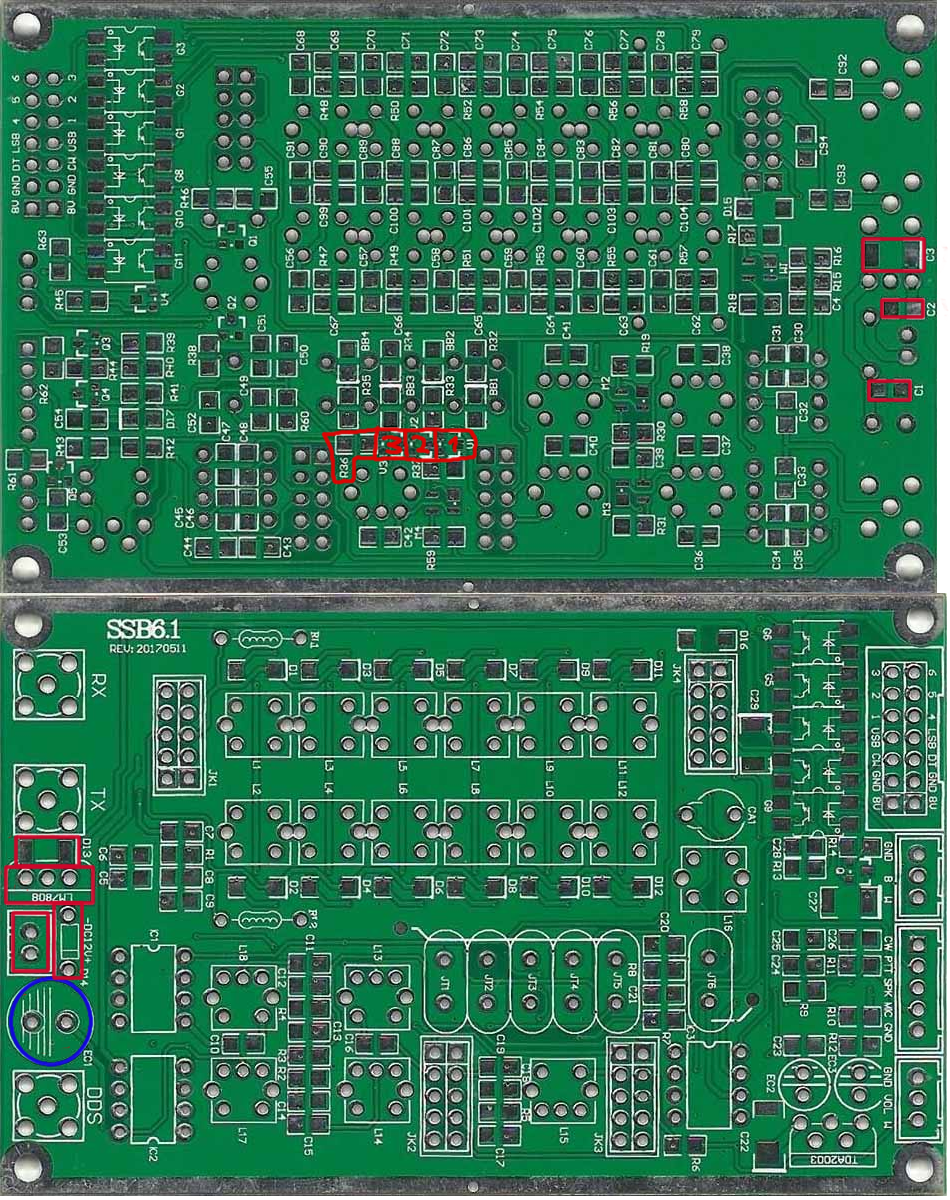
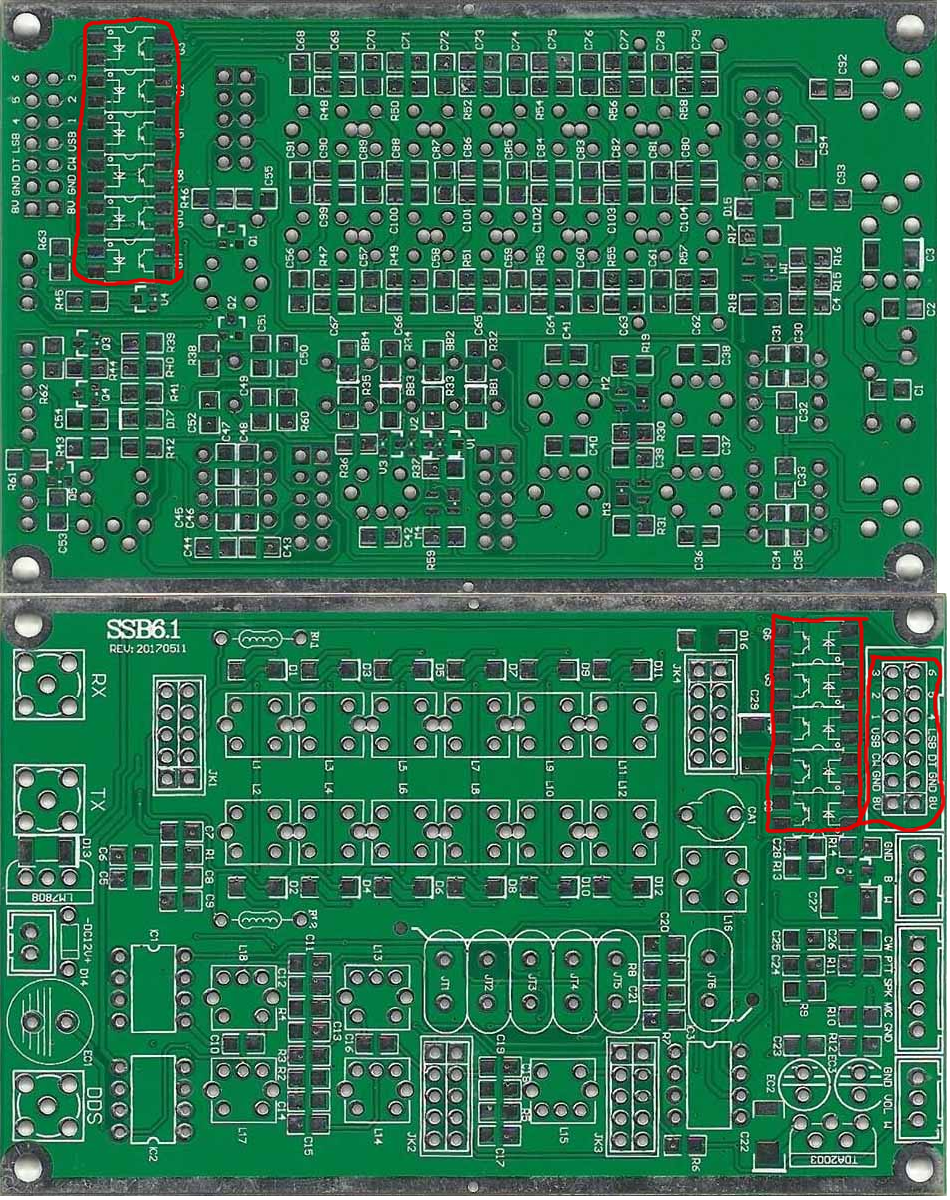
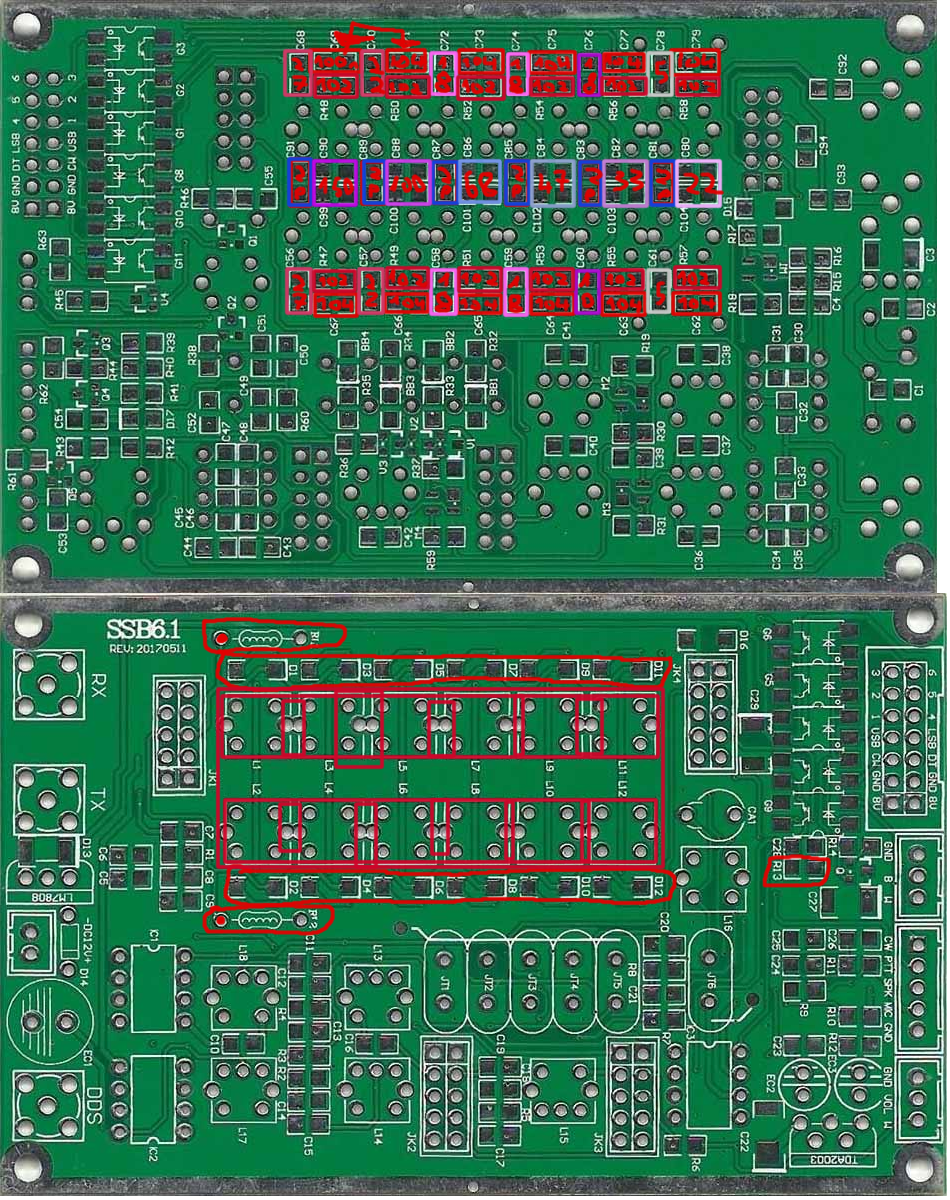
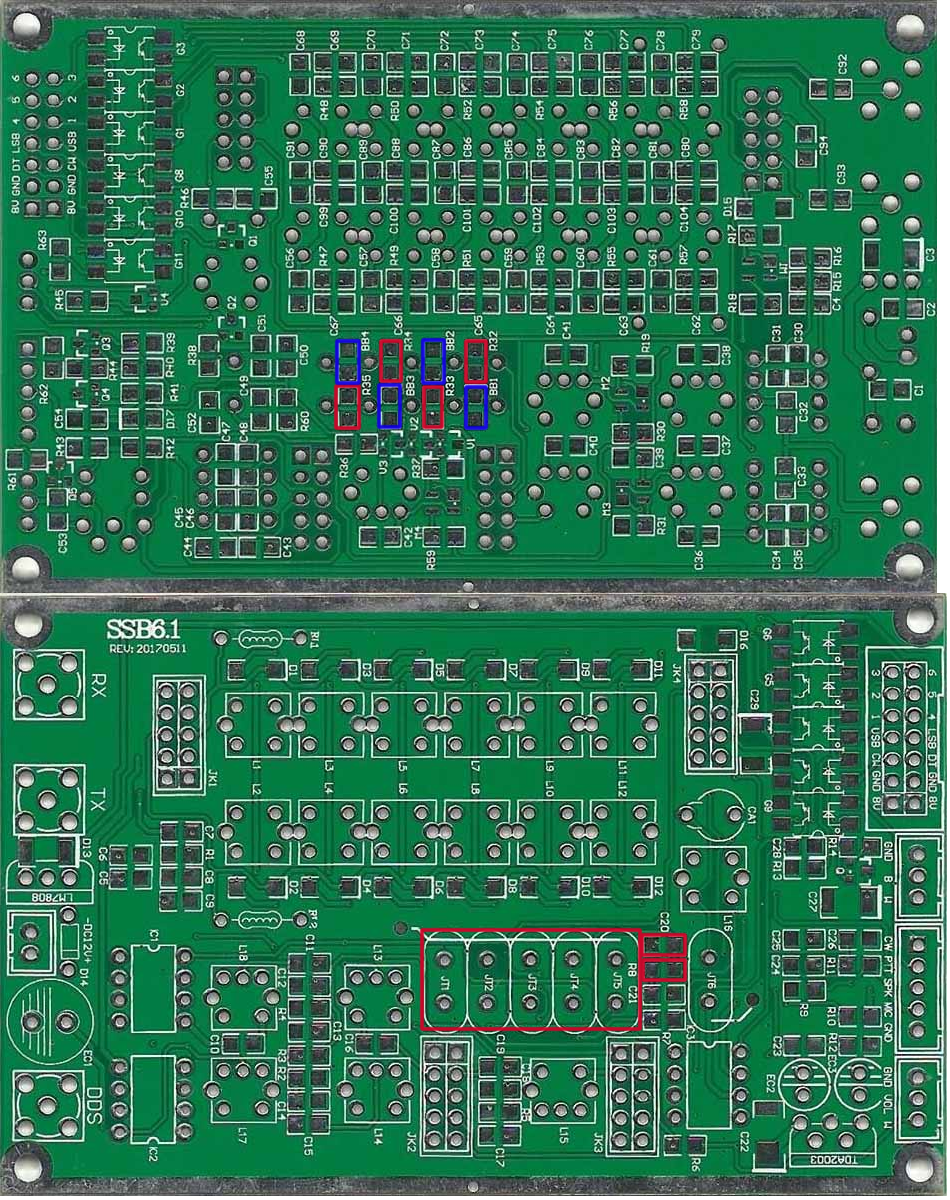
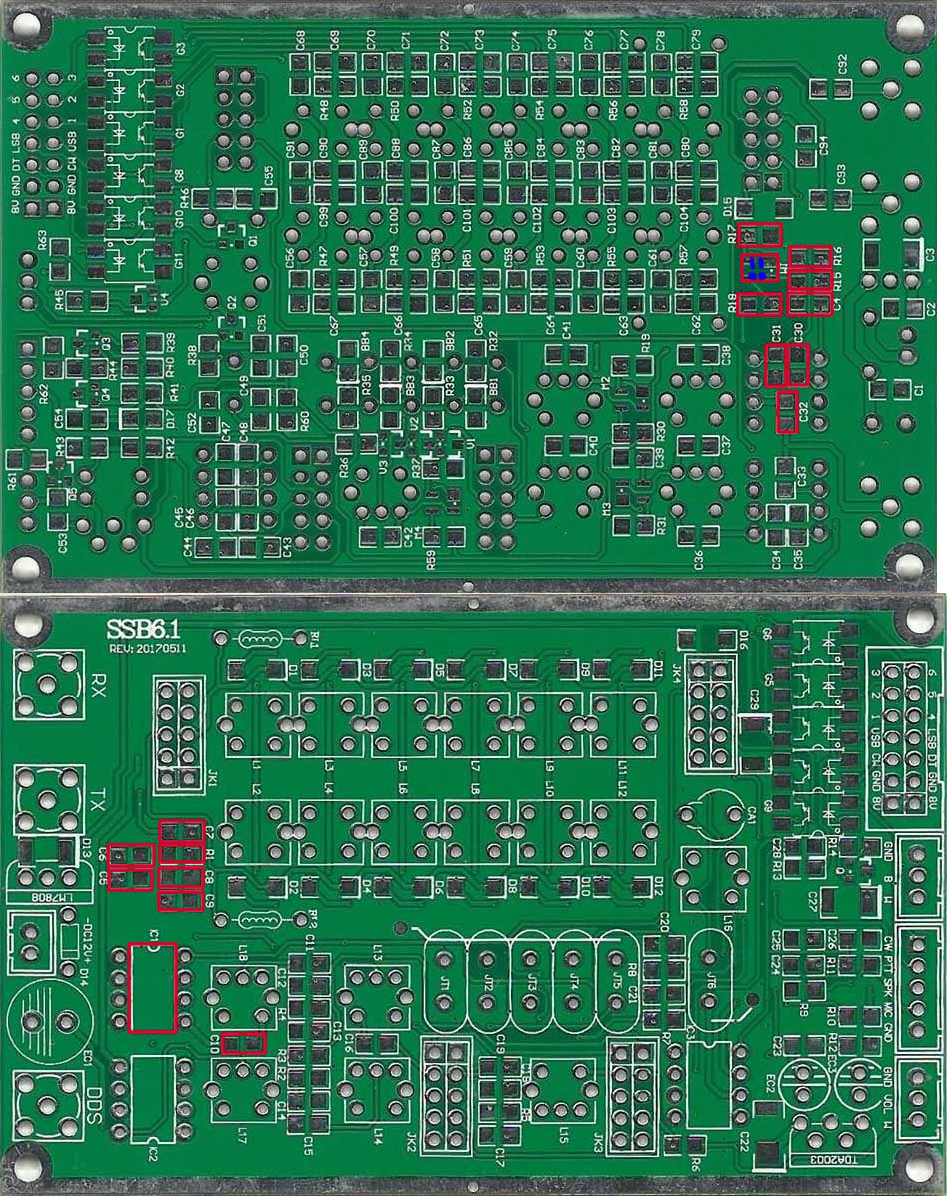
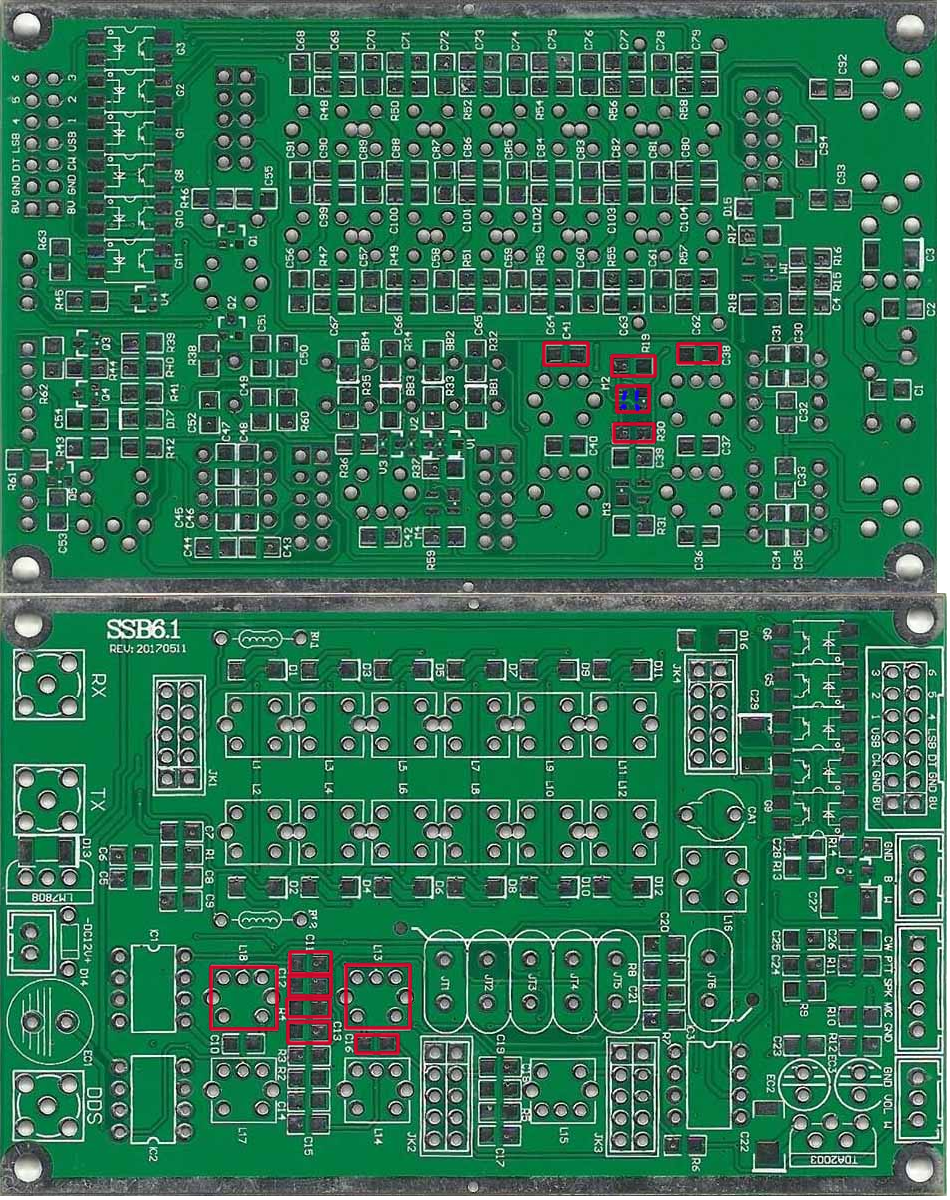
The schematics above are not fully needed, as they are bought as kits from aliexpress, soldering the PA isnt required, As for the mainboard for TRx’ing, Ive expanded on This PDF by G0CWA With extra images to help:
Here I have drew out where each component is from step 1 to 11, from each bullet points from This PDF
Step 1 being 4. Voltage regulation and PSU, and so on. (Downloading Krita and opening the Raw Krita File will help as i named each layer and step)

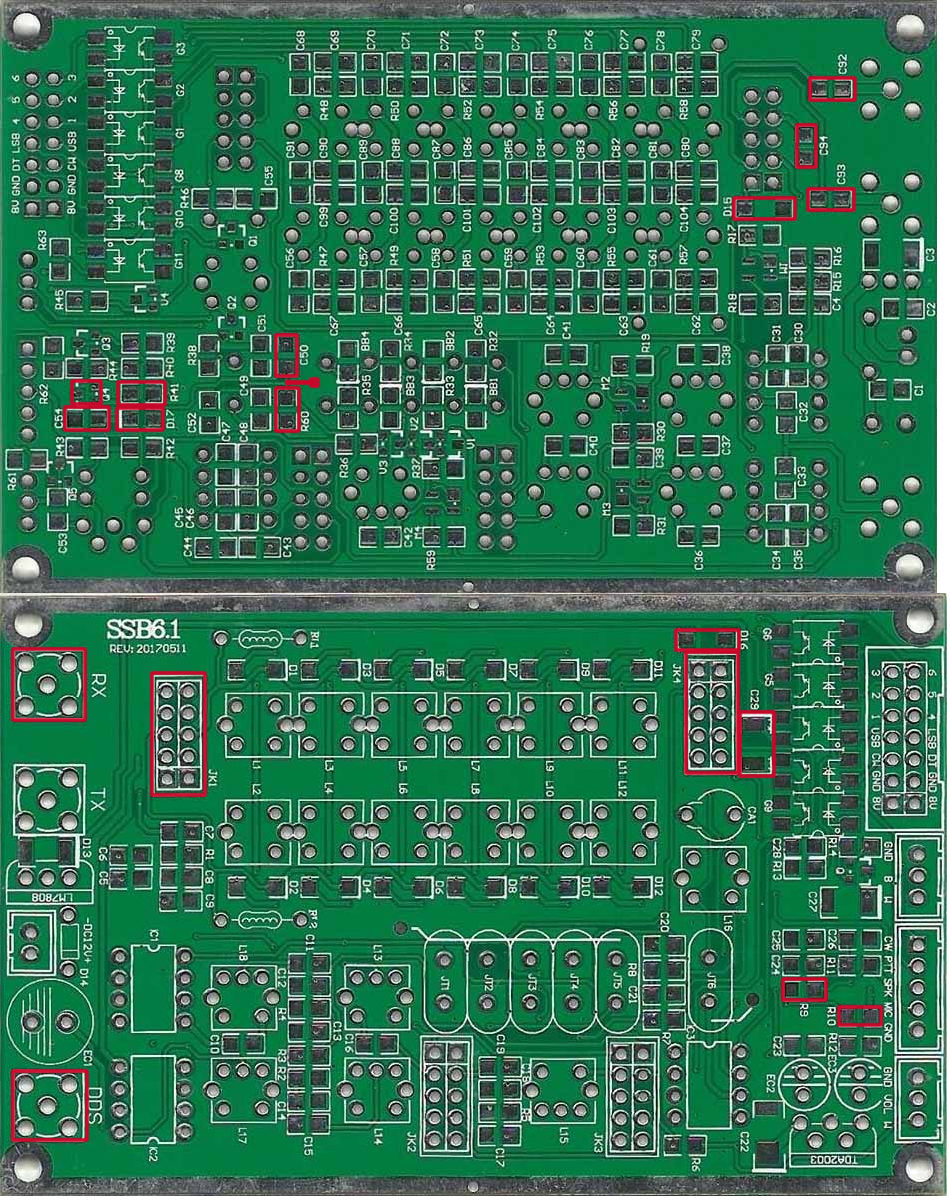
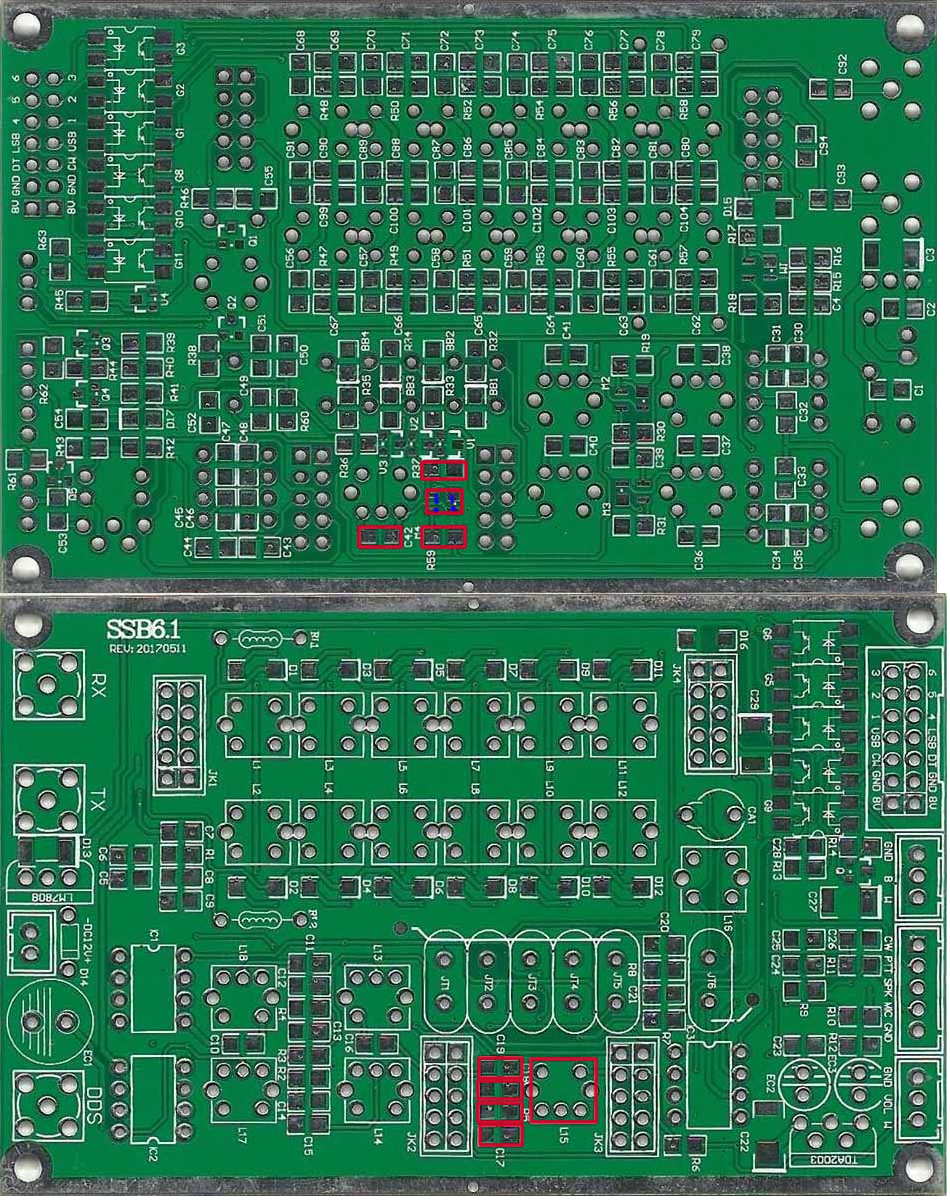
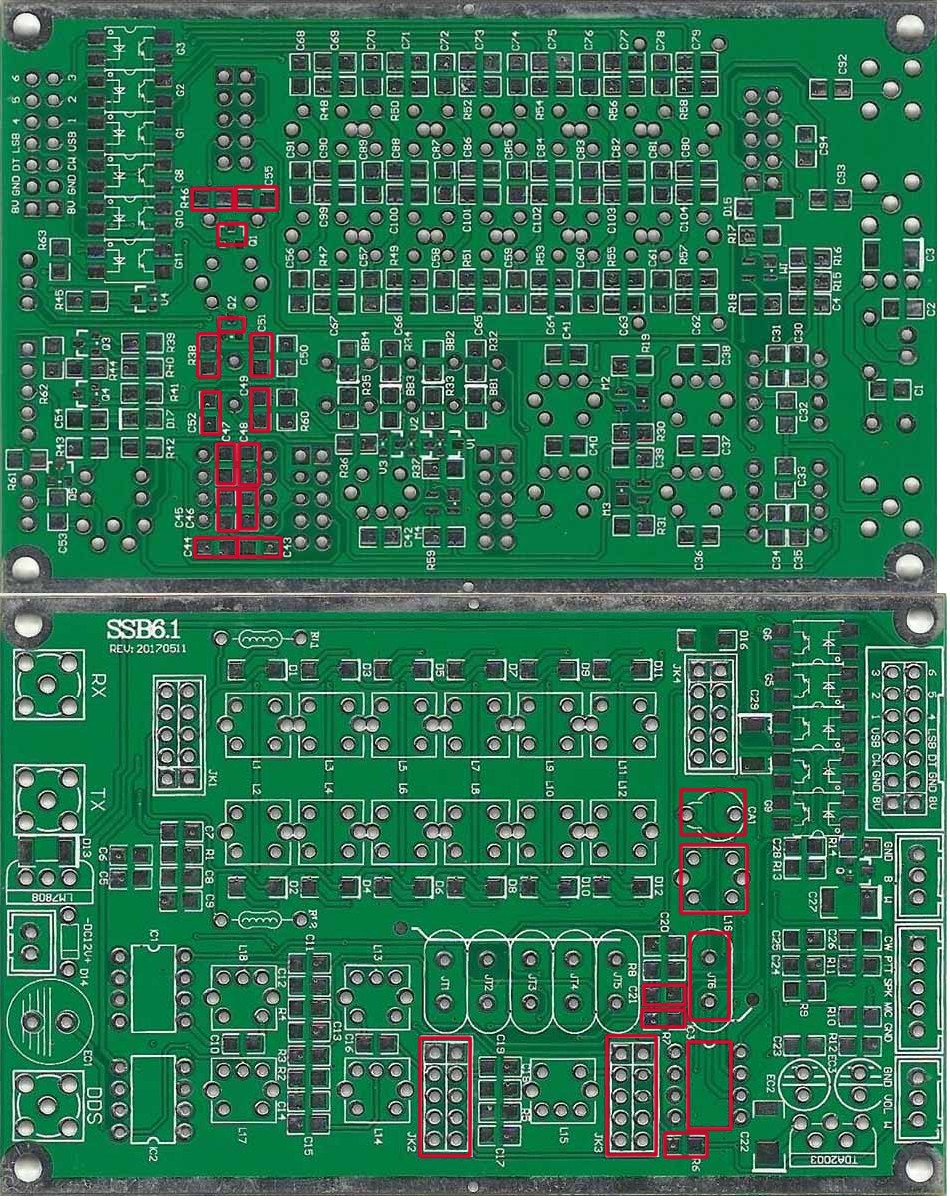
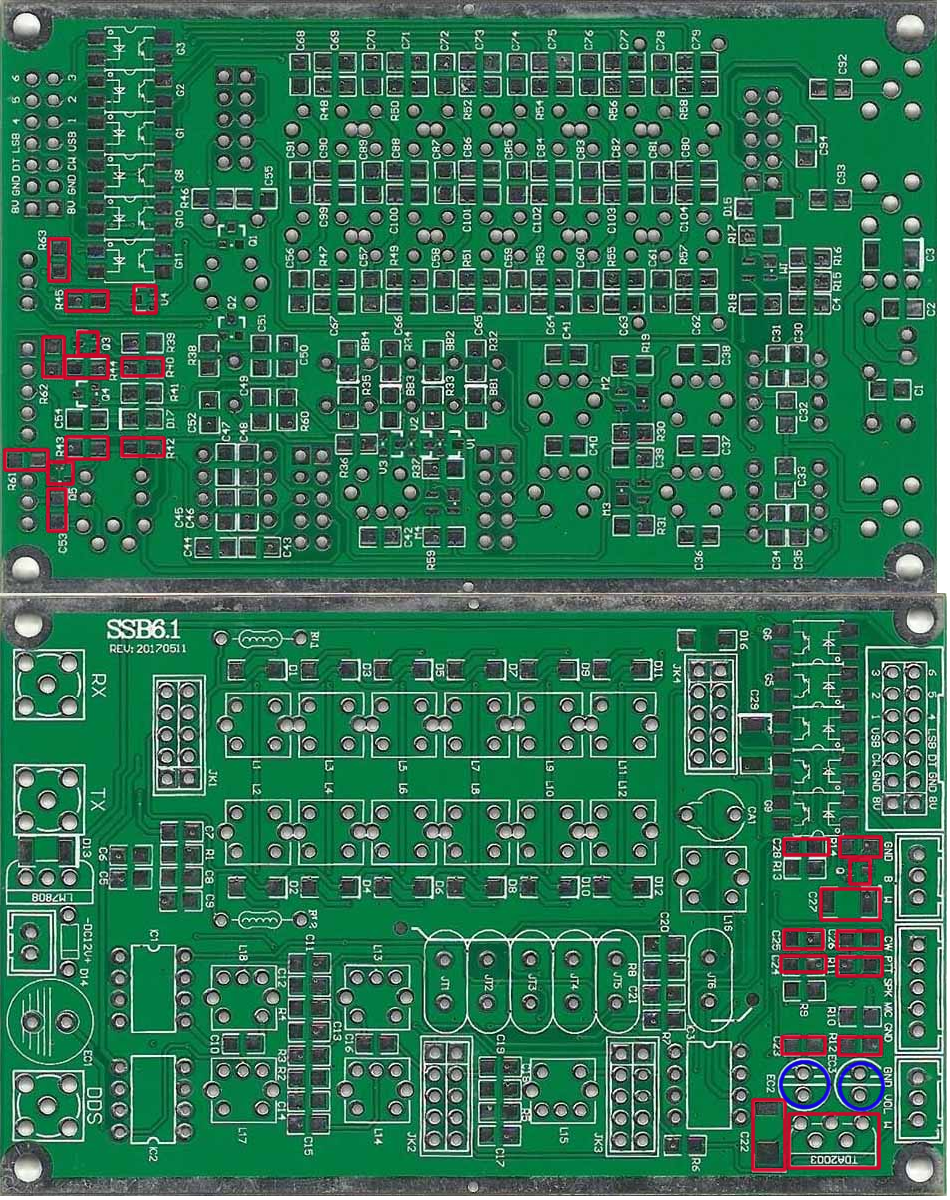
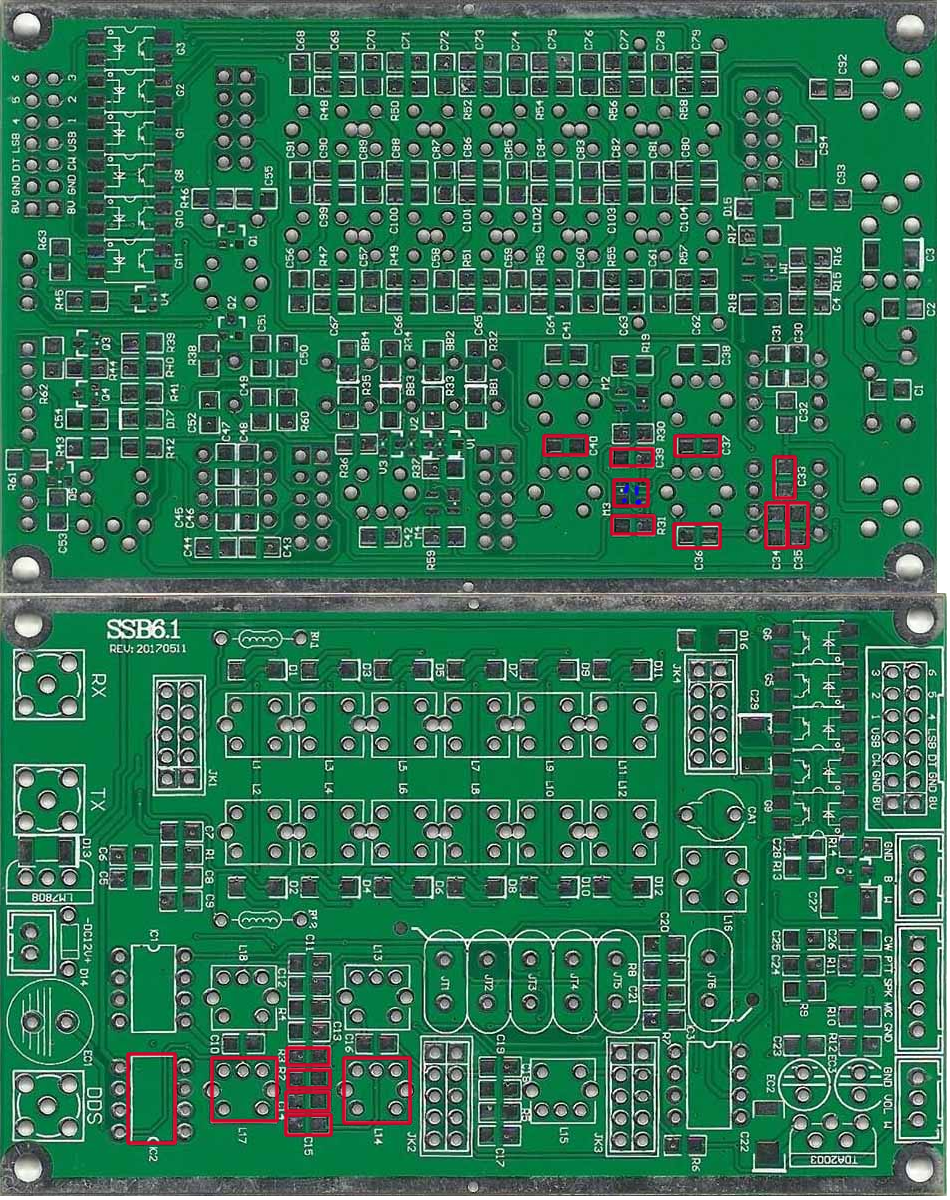
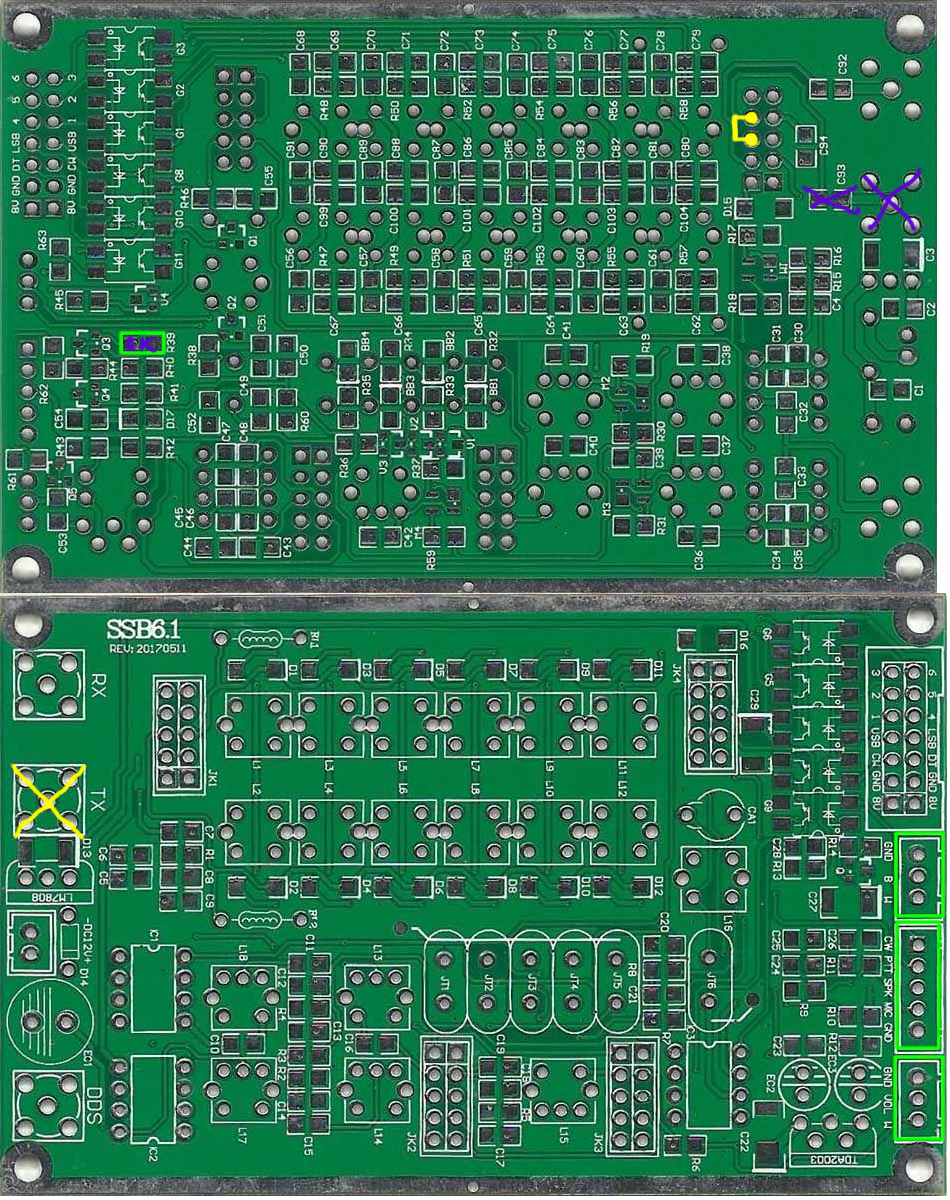
Here is the fully finished pcb,