Intro 
Want to look at the radiation in the area? Or make one for your village or town? well lucky you you found THIS
If you press THIS you can have a look at the live websitw to see how simple it is.
Main features:
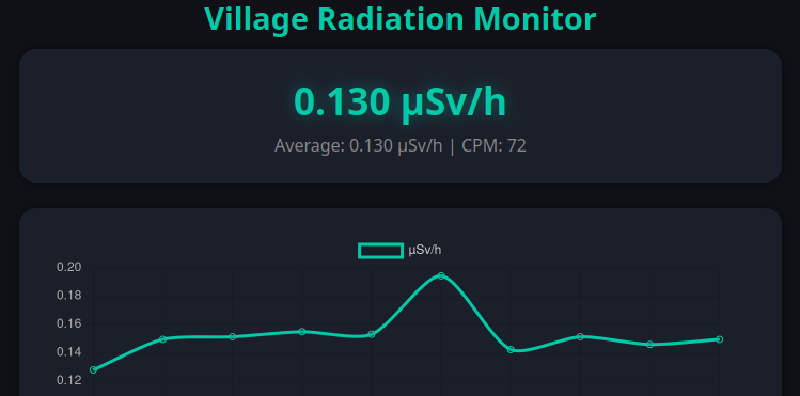
- Simple To understand Radiation levels with colour coding
- History graph 10mins / hours / days
- Language Auto-Select and Toggles
- Only requires a ESP8266 & ofc a GM Tube / Driver
- Toggleable notification that warns you when there are high radiation levels
- Open Source
Setup with CloudFlare
Note: I assume you know a tiny bit about how to use CloudFlare
- Make a Worker on cloudflare,
- select “hello world”, replace the code with the one from the github
- once done, go out of editor and go to settings, find “Variables and Secrets”
- make a new one, press add, type as secret, Variable name as
DEVICE_TOKEN - value as some long text that you will need to remember, since you will need to add it to the esp8266 aswell.
- make another “Variables and Secrets” and keep as text, put Variable name as
CPM_TO_USVand setting it is dependent on the geiger tube you have, if you are lazy jus put0.0018in. - go to the Bindings tab, make a D1 database and set “D1 database” as
rad-dband Variable name asRAD_D1 - do ctrl+k and search “KV”, click on the only article, press creat instance top right, name it rad-kv.
- go back to Workers & Pages, open Rad or whatever you called the project, back to Bindings tab, make a new “KV namespace” binding and set the Variable name to
RAD_KVand for “KV namespace” click the dropdown and set therad-kvyou just made - Click on D1 database, open Console tab and type in:
CREATE TABLE IF NOT EXISTS readings (id INTEGER PRIMARY KEY AUTOINCREMENT, ts INTEGER NOT NULL, clicks INTEGER NOT NULL);
- great, now make a new platformio project with the D1 mini lite, paste main.cpp from the repo to your main.cpp, and put your DEVICE_TOKEN as the secret you hopefully noted down, wifi deets and api url which you can get from settings in the worker on cloudflare, you will see type, workers.dev, Value, and then that is what you want, (dont remove the
https://at the start and the/ingestat the end!!!) - flash the esp (make sure to install the ArduinoJson lib), and now wire up the geiger tube out pin with pin D5 on the D1 mini, (GPIO14), note it can be any “ESP8266” devkit.
Hardware
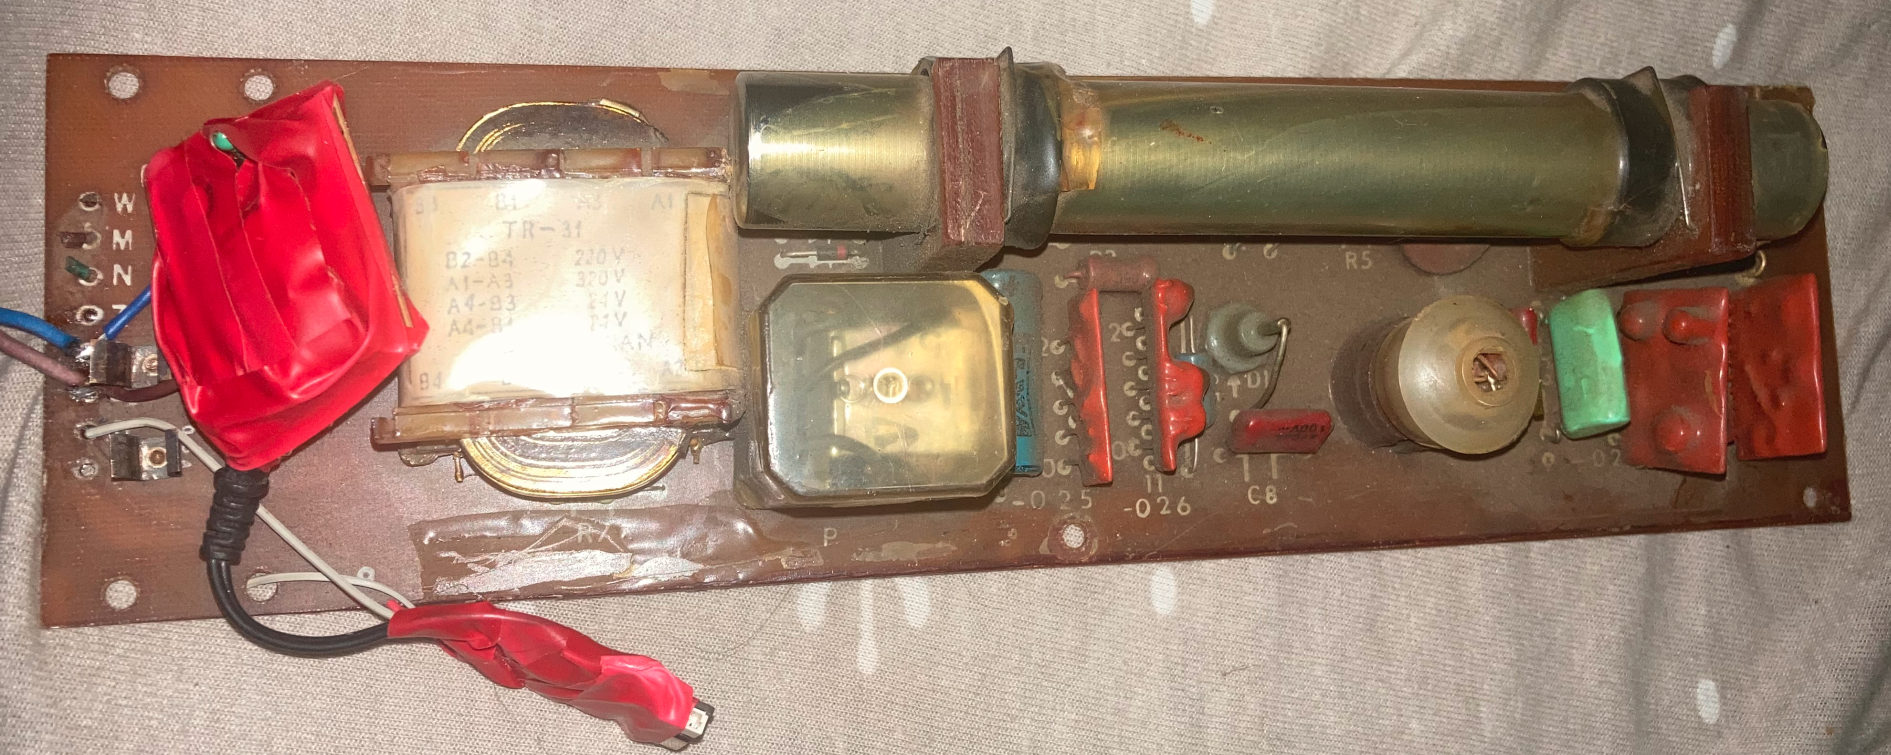
if your for some reason using a old solviet geiger counter used in silos back in the 90’s then heres the next steps: now you need a 2N2222 transistor, 10kOhm & 47kOhm resistor.
Signal of GM > 47kOhm > base
emitter > GND (GM tube and esp need to share GND)
collector > GPIO14 (D5 pin) & Pull up the pin with the 10kOhm resistor to 3v3